14 for 14: Working with the Script Workspace
By Daniel Wood, 19 May 2015
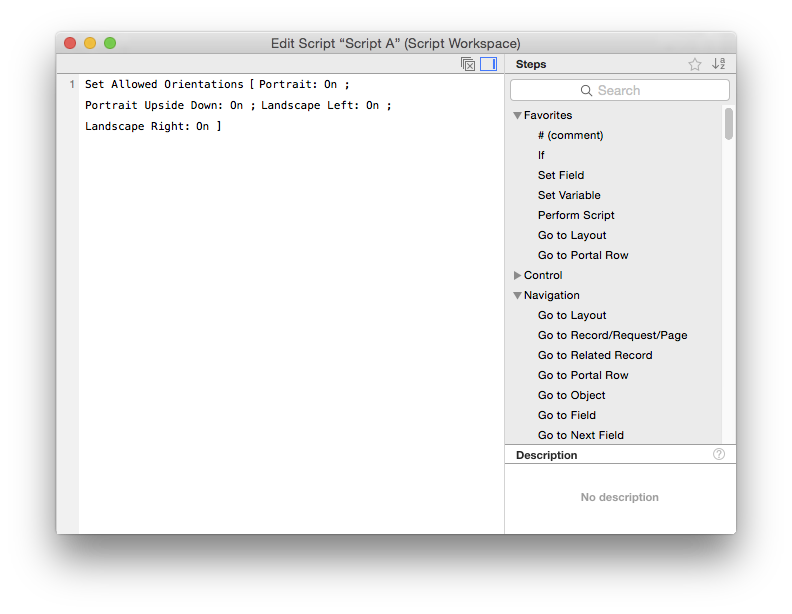
What the Script Workspace looks like
Below is our reference image of the script workspace that we will use in the article, just click on it to enlarge.
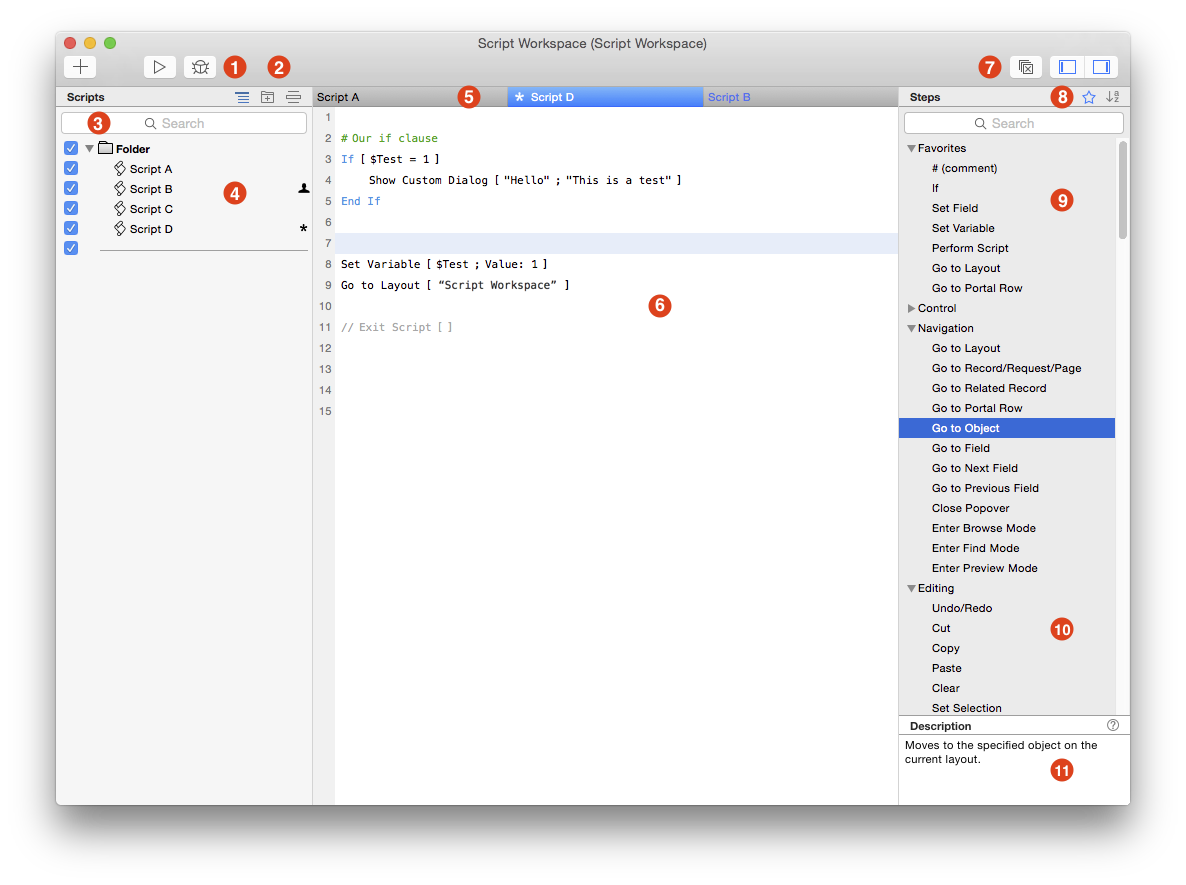
1. Running a Script
These two buttons allow you to either run the selected script directly, or to run the selected script in the debugger. Being able to run direct in debugger is a great new feature and saves you having to open and close the debugger while working on a script.

The + button is for creating a new script. The new script is placed underneath the selected script (if any) otherwise it is placed at the bottom of the list of scripts.
2. Working with the Scripts Menu
The script workspace is divided into three main sections. The first we will deal with is called the Scripts Menu and this always appears as the left-most section.

The first button is for showing/hiding the "Show in Scripts Menu" checkbox. When ticked, a script appears in the scripts menu. This button is not for setting this checkbox, merely to show or hide it.
The next icon is for creating a script folder.
The last icon is for adding a separator. In the Script workspace, separators are no longer blank scripts, they are actual separators.
3. Script Search
This is for locating a specific script or scripts in your list. The search works in the same way as previous versions - it will search from any point in the script name but only sequentially. In the screenshot above we have scripts named Script A through Script D.
A search for "Script" will find all scripts. A search for "Script A" only finds that script. A search for "ript A" will also find this script.
It is important to note this search differs from the way the script workspace and data viewer now carries out auto-complete on your text, you can learn more about these in other 14 for 14 articles
Folders are also shown in search results for the matching script.
4. Script List
The list of scripts will show folders and script names. We have already covered the show in scripts menu checkbox.
There are two other icons that can appear beside a script:
 This icon indicates the script is run with full access privileges
 This icon indicates the script is in an unsaved state.
5. Open Scripts
There is more to this one than meets the eye. The script workspace now has tabbed scripting meaning no longer will you have separate windows for open scripts.
Now, there are some interesting things to note about how the tabs work. To demonstrate this lets start with no scripts selected:

Without a script chosen we get a nice icon of a script, how lovely.
Now lets single click on a script. Note here single as opposed to double click.
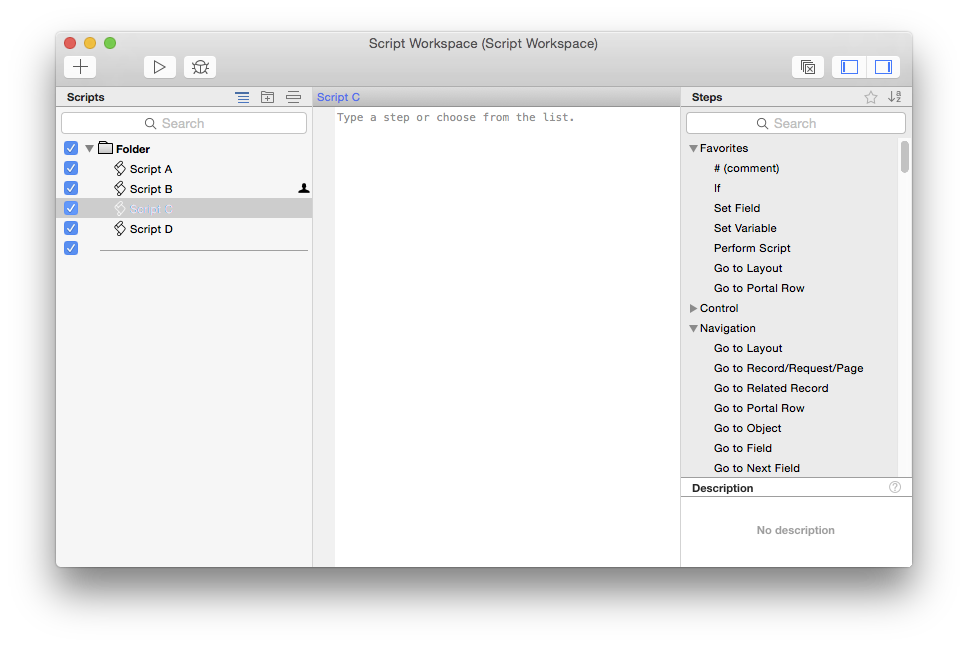
When a single script is chosen using a single left-mouse click you'll notice the script name appears in blue text. The blue indicates that this script is the "active" script, and the one that we shall call "unlocked".
If you now click through other scripts using a single click, this will change the active unlocked script to the one you choose. The end result is only one script tab open at any given time.
Now lets go back to nothing selected and this time we will double click the same script:
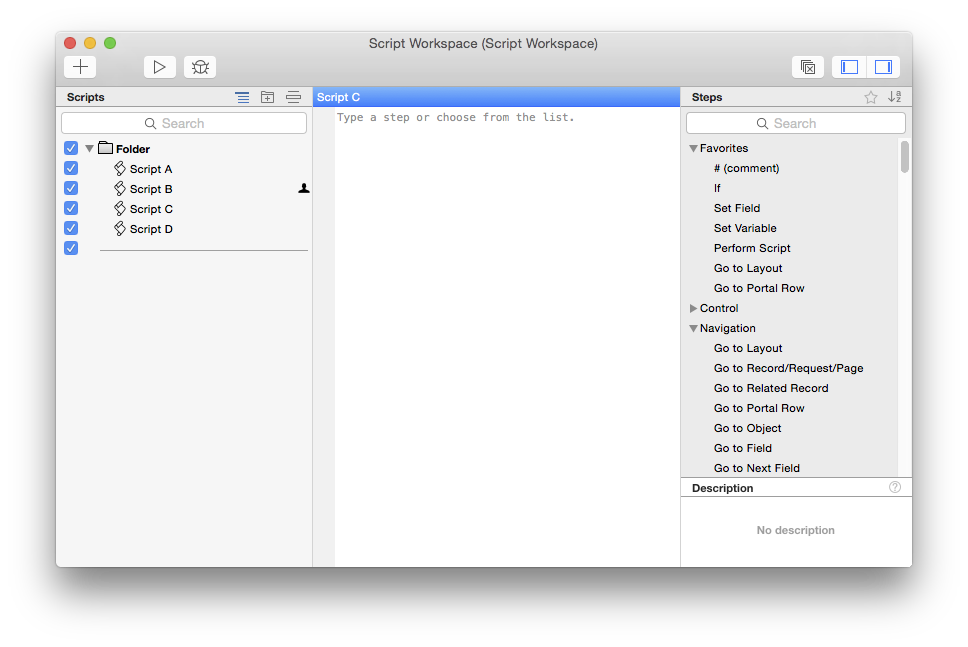
The script tab is now entirely filled blue as opposed to the text blue. A blue tab indicates the active tab. In this case because we double-clicked Script C it is now locked into its own tab. If we now select another script, we will open that in a new tab, with Script C now locked into its own tab:
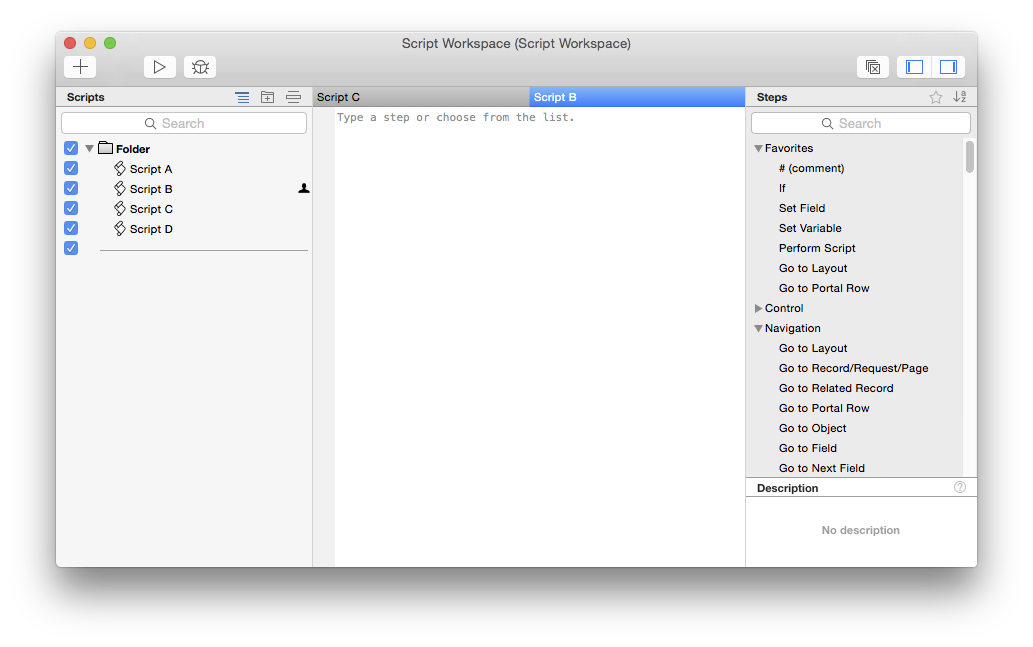
Script B is now the active tab, but because we single-clicked script B to open, it is not locked to its own tab, and choosing another script will replace Script B with the new script.
This will be an important distinction to learn. In situations where you want to keep a script open in the workspace remember to double-click. If you do not need it locked single-click instead.
You can also still open scripts in their own standalone windows if you need to. This is not a shortcut feature, nor is there a button for it. You can access this via the contextual menu or the View menu while in the script workspace:
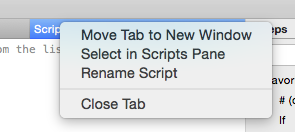
Note also the feature to select scripts in the scripts pane. This is useful if you have lost your context in the scripts list, for example if you have searched for another script in the mean time.
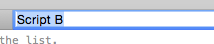
You can directly edit a scripts name by double-clicking its open tab:
6. Scripting Area
This is where the core of your scripting occurs. There are a number of great features here to help you write scripts fast.
One of these is auto-completion of script steps you type. This is covered in a separate 14 for 14 article where we give you all the shortcuts you can enter to enter specific script steps.
One thing you may notice first is there is some colour now to scripts. Colour can be defined for the following:
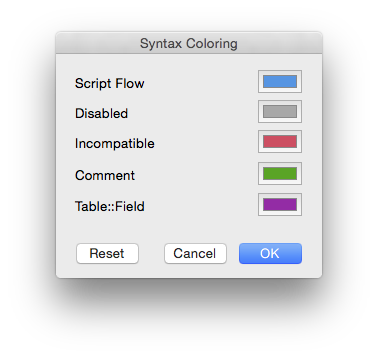
The above menu is accessible via the View -> Syntax Coloring... menu.

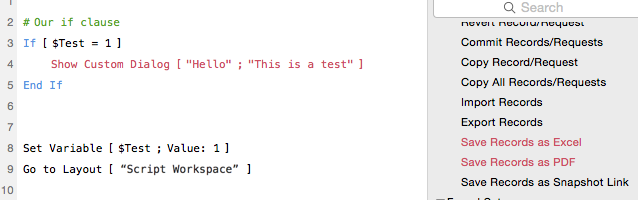
This script step has been disabled, but how do we disable steps? In FileMaker 13 there used to be a big disable button at the bottom of the script, but this is now gone.
The answer is to use a shortcut key, this is by far the quickest way. On a mac the shortcut is cmd+/ , on windows this is ctrl+/ . You can use this to toggle enabled/disabled. The option is also available via the Edit menu.

A blue line indicates that line is selected. How might we go about inserting a blank line into a script? In the example above lets say we want to put a blank line between these two steps.
The answer is simply the return key.... with a couple of gotchas to look out for. A script step may be selected such as above, but there is a difference between a selected line, and an active script step. When no step is active, the return key will create a blank line.
We can now also define whether to insert a blank line below or above the selected line. Hold the shift key with return to insert a line above the selected line.
Back to active steps. How can we tell if a script step is active? The surefire giveaway for most steps is either the settings cog icon appears blue, or any part of the line appears in a blue outline:


Both of the above steps are considered active. For active script steps the return key does not create a blank line but has the action of activating the step. This normally means either toggling a setting, opening the script step setup, opening a popup menu, or directly entering the step for data entry as is the case with an IF script step.
Initially this may cause the greatest source of frustration for you when trying to work with scripts. More often than not once you finish setting up a script step your next action is to insert a blank line, however your script step may still be active in which case you will go back into its settings.
There are two ways to resolve this issue. The first is to use the command modifier key with return (ctrl on windows). By using cmd+return, this will always insert a blank line beneath your active script step.
Another way we have uncovered during development is to simply save your script using cmd+S. Saving a script will deactivate any active line.
Working with Script Step Settings
Once you have an active script step, return generally will open its settings in whatever form that may take. For control steps such as IF and LOOP it will depend on what is visually the active element of the step:
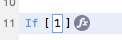
These steps have two possible active elements - the direct data entry component, or the Fx button which will open the calculation engine. The great thing about this script step in 14 is you can directly enter the code for a basic IF statement without the need to enter the calculation engine. The tab or arrow keys can be used to toggle between the active areas of the step, and the return or space bar will activate that area.
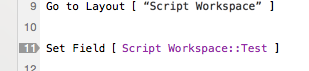
We won't cover all variations on steps but suffice to say the vast majority of script steps will no longer require the user to reach for the mouse to setup which is great. There are still some steps that are going to require you to reach for the mouse, such as Set Variable, or set field (if you need to specify via calculation) or the setup of a Custom Dialog. We think these will slowly become a thing of the past and in future everything will be mouse free.
Knowing when to use space bar versus return
Not all script steps work quite the same, and different steps have different amounts of settings. Sometimes you will find using the space bar to setup a step is much faster than return. We will use the common "Set Field" step as an example here.
First thing we do is type "set f" followed by return to create the step:
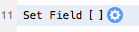
The step is selected, and the settings icon is activated. This means we can use the return or spacebar to open the settings:
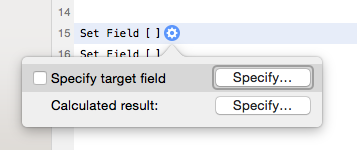
For all intents and purposes it looks like the 'specify target field' option is selected. It is, but the return key will dismiss the settings popover we are looking at, which is not what we want.
Instead, the spacebar more often than not will open the selected settings area, and from there we can setup the target field (albeit having to reach for the mouse most likely!)
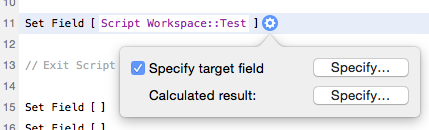
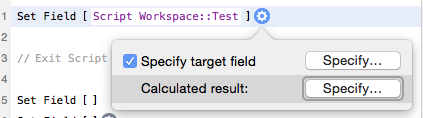
Once we select the field, we are presented with the above. Now it looks like no setting is highlighted so what do we do? Well, return key will dismiss the dialog so that's no good. The spacebar does nothing because no setting is chosen.
In this instance arrow keys become our most useful keys. A down arrow press will reselect the specify field option. Pressing down a second time selects the calculated result option, and then spacebar will open it.
While it may seem odd, we guarantee you will get into the habit of using a combination of return, space and arrow keys to navigate these various steps with ease, it just takes a little practice!
What about comments? Well in 14 a comment is still a script step, but it is very easy to add. simply enter a hash symbol to directly enter a comment. Alternatively a quick way is to use space+return in sequence. Space will initiate the drop-down of auto-complete steps. Comment is the first step in this list as shown below. Now just hit return to add that. Some may find this easier than reaching for the shift+3 shortcut. (note that compatibility shows in auto-complete how nice!)

The final thing we'll mention about the script area are line numbers.
While they serve no real scripting benefit, they are useful if you are referencing a specific point in a script to another developer or user. Breakpoints can still be set by clicking on a line number as shown above.
There is so much more to the scripting area but we will leave it up to you to explore!
7. Manage workspace and compatibility
The first of these three buttons is for nominating a specific compatibility platform:
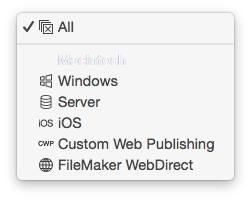
Lets say we only want to show Server compatible steps:
Incompatible steps appear here in red in both the script itself, and the list of script steps. This colour is a customisable colour, but red is pretty clear !
The other two icons are for expanding/collapsing both the scripts list, and the script step lists. We think that you'll actually end up never showing the list of script steps when you become more proficient at working with the new script workspace. Once you learn your favourite shortcuts for auto-completing script steps there really becomes no need to show a list of steps, and it can be hidden to free up more space for the script.
8/9/10. Script Step List
If you do feel the need to list all of the script steps, there is a nice new feature that allows you to mark specific steps as your favourites. These appear in the top group of scripts so that they are readily available (Think Show custom Dialog!!)
To add an item as a favorite, click the star icon with the step selected - and do the same to remove it from the favorite list.
The a/z icon is for showing the script steps as a full list alphabetically as opposed to grouped by category.
If not sorting alphabetically the grouped option is really much better now as you can collapse groups that aren't frequently used to keep your list of steps shorter.
Script steps can also be right-clicked to reveal the following contextual menu:
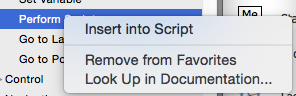
A useful option here is to look up the step in documentation, useful for beginners (or developers who have forgotten a thing or two!)
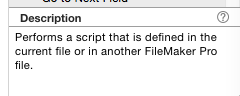
11. Selected Step Information
Another good feature for beginners. This panel displays some information about what the selected script step does. You can also click the little question mark icon to go to the documentation for that step.
Contextual Menus and Script Menus
It is worth also exploring contextual menus and the script menus for additional options and shortcuts. There are a number of contextual menus in the script workspace.
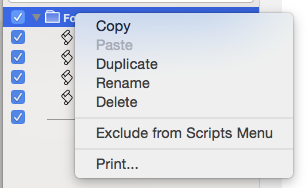
The folder contextual menu has options that are normally achieved through shortcuts, however we think the Print option is pretty cool. this will print all scripts within that folder. This has been a useful tool in the past if you need to locate a given item in a script. Print the scripts to PDF and then search the PDF for what you want.
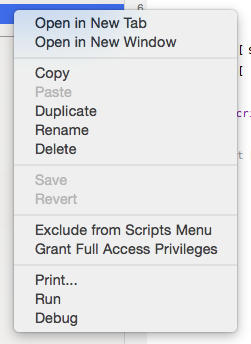
Most of the items in the script contextual menu are again fairly straightforward but you'll notice here you can choose to open a script in a new window. This is not a shortcut feature so you will have to use the contextual menu on either the script, scripts open tab, or the View menu. Note that a script in its own window does not have the scripts list:
 The edit menu in the script workspace has all the usual suspects, but just take note that this is where the disable/enable script step option and shortcut lives:

The view menu contains the syntax coloring option which is not accessible from anywhere else, and has no shortcut attached.
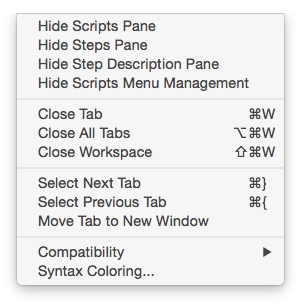
Note the different shortcuts for closing items. We don't think closing all tabs will be used much as holding down the close tab shortcut for a second or two seems to do the same job. It will be important though to distinguish between closing a tab and closing the workspace. In FileMaker 13 we only had the ability to close a script - there was no workspace. Now you'll need to learn to hold shift to close the whole workspace.
It is also interesting to note that if you close the workspace with scripts open, those scripts will remain open once you reopen the workspace, a really nice feature. Even cooler is that this persists even after the file is closed for files both local and hosted!
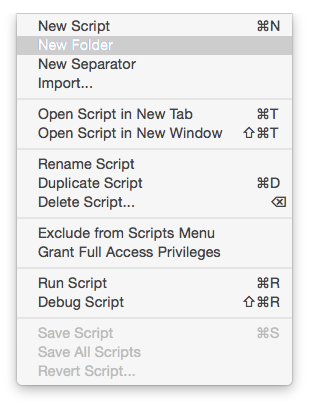
The scripts menu has all the usual suspects. Ones to note are the shortcut for opening a script directly into a new window when selected. If you have a script open in a tab, then using the "Open Script in New Tab" has the effect of locking that script tab open.
In Conclusion...
The script workspace is awesome, embrace it and love it!!!!!